Showing posts with label Vegetables. Show all posts

Saturday, February 23, 2013

Seedlings move up!

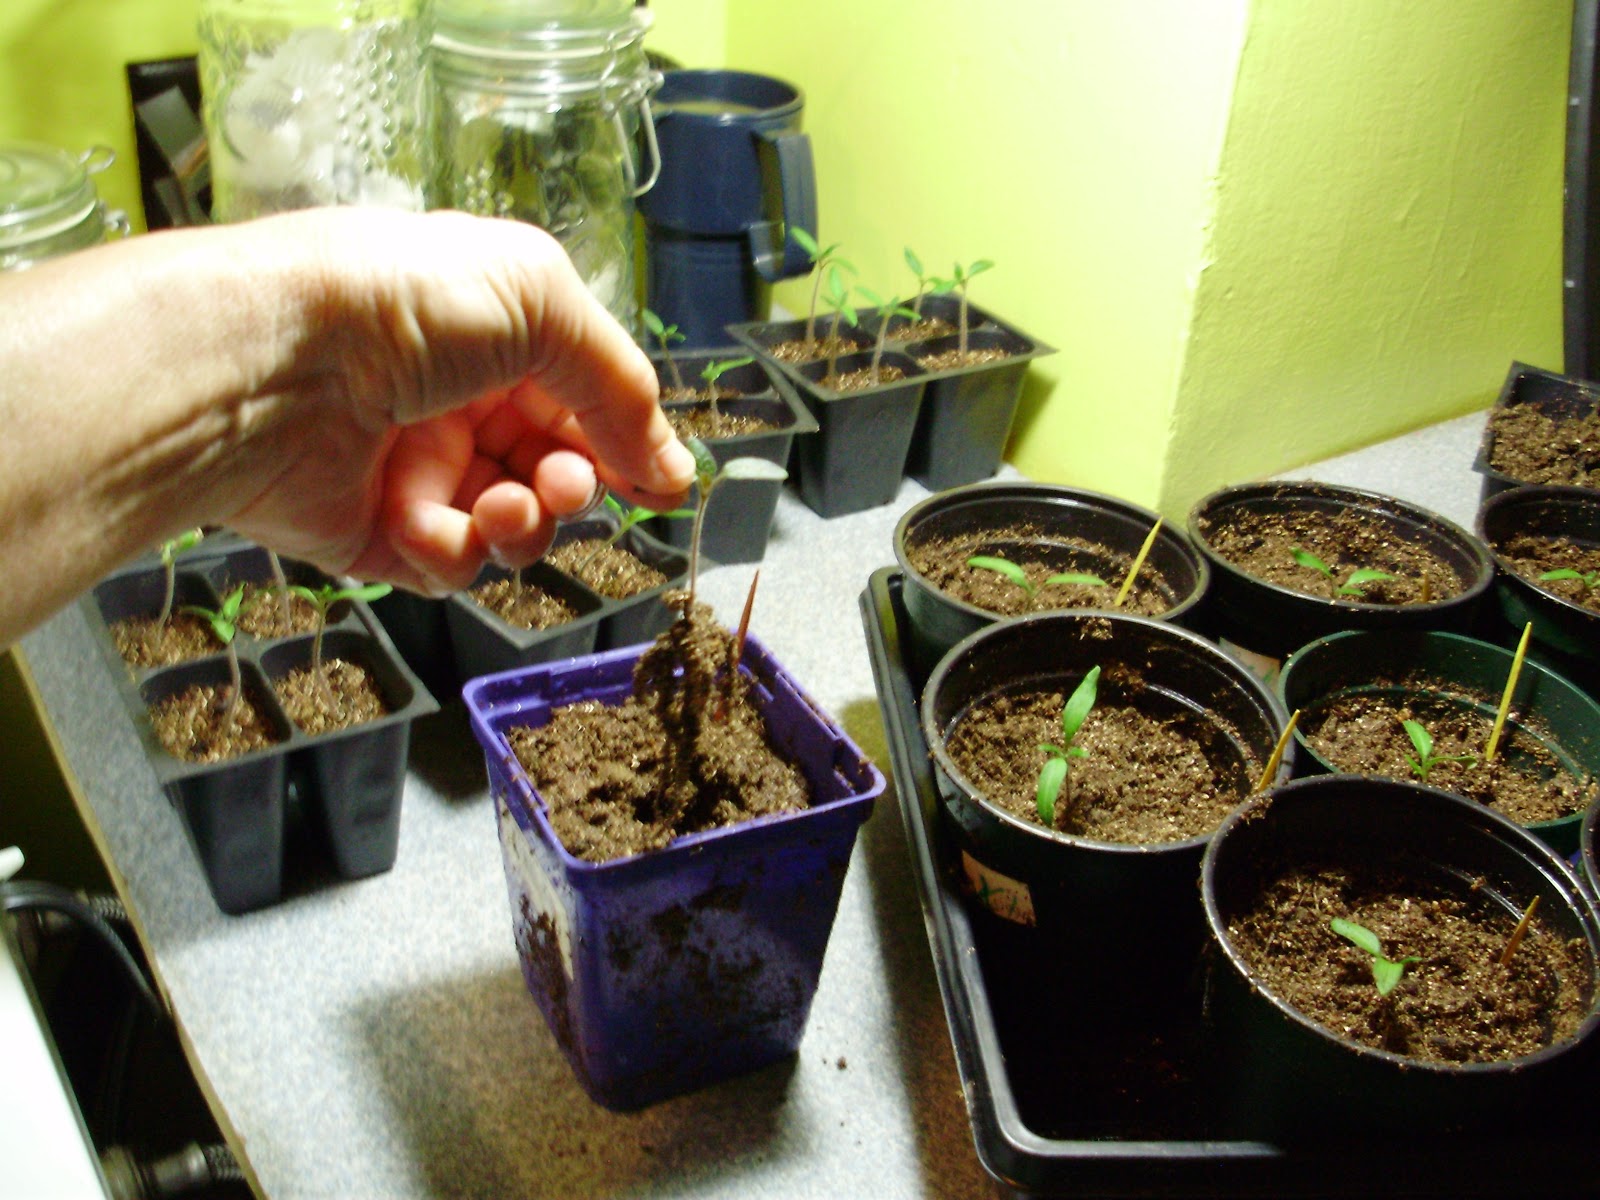
My tomato seedlings now have two true leaves showing. Some of course are bigger than others but all are being moved into 4" pots. It is a some what messy process but as it is a rainy Feb. day I have the time to move them and clean up!
I am using Jiffy Seed Starting Mix for this stage as it is light and free of disease. I will later use a light mixture of fish emulsion every other week to give the little ones the nutrients they need.

I filled the new pots with the Jiffy mix and then
soaked the pots in the sink. See picture to right.
After soaking for an hour I sprayed the top of the pots with a little more water. The center of the mixture was still dry but I watered once again after I set the seedlings.

When moving the seedlings from one container to the other be careful not to pick it up by the stem. It is very easy to crush the fragile stem and


not know it! Use the cotyledon leaves to pick up the seedling as you dig it out with a fork or such instrument. Have the new pot ready for the seedling with a hole that is deep and wide. You will be surprised how long the root system is on your little seedling.
Once all are potted up place once again under the grow lights. Be careful how much you water at this stage, it is very easy to over water the little ones! Once or twice a week is probably enough. I will do the fish emulsion fertilizer every other week until I move them into the ground.

The journey is good!

Tomato seedlings


I started my tomato seedlings on Feb. 3, 2013. As you can see in the picture above I chose to use the standard 4 cell growing container that I salvaged from where I work part time. I also chose Jiffy Mix Seed Formula for the planting medium. It is best not to use any soil for starting the seeds. I have read the best way to be sure you are getting the right mix for seeds is to feel the weight of the bag. If the bag seems too light for its size it is probably the correct mix for seeds. It is also best not to have fertilizer in the mix. Before I planted the seeds I sterilized the pots with a mild bleach solution, added the dry mix and placed the pots in a standard black, plastic
tray. I filed the tray with water and let it sit
for a few hours or until all the water was absorbed into the pots. I added more water to be sure the pots were sufficiently wet, pouring off any extra water. At this point I planted the seeds at the recommended depth for the variety I was sowing. I planted the following varieties; Alaskan Fancy, Glacier and Golden Jubilee. All are heirloom. The first two are determinate and the last is indeterminate. I marked the pots with a code so I would know which is which!
At this point "all's ya need to do" is cover the tray with a plastic top and wait for the seeds to germinate. No light is required at this time but bottom heat is necessary. I place the tray above a heating pad. Note I did not set it directly on the pad but used two short pieces of 2x4's to raise the tray above the heat. You can purchase special heating pads for this part of the process but they are expensive. Regardless of what you use just remember water and electricity are not a good mix so be careful! I made sure the seeds stayed moist but not too wet. If you see a lot of moisture droplets on the cover lift it a bit until some of the moisture dissipates. Most of my seeds sprouted in 7 days.
Once the seeds start to sprout remove the cover and place the tray under a grow light of some sort. The light needs to be very, very close! See above picture. At this phase of growth you need to mist the seedlings once or twice a day, give them 17 hours of light and pass your hand lightly across the top of the plants. This "hand passing" helps to strengthen the plants. Some people will use a fan for this but I like the idea of "touching" the babies! Silly me.
The first set of leaves is not actually leaves but part of the seed and is called 'cotyledon'. The purpose of this phase is to give the plant the nutrients it needs to continue to grow. Many of my seedlings now have their first set of true leaves so it is time to transplant them into a 4" pot. I plan to continue to use Jeffy Seed Mix for this phase and add fish emulsion for the nutrients they will need. I will post this phase at a latter date.
Let me take a moment to share about my top picture which is my very own "seedling hut"! I keep my house on the cool side so I must take precautions to keep my plants above 50 degrees and below 80. The high mark is not a problem for me but the low can be tricky. I used a second hand end table and drilled some holes to place my grow light pipe into so it would be secure. I then attached a cheap grow light to some chain and hung the light at the distance I needed. I used the 2x4's once again and set the tray upon them with the heating pad under neath. I then placed a towel over it all to keep the heat from "floating" away. The bottom line is with this contraption I am able to keep the plants at a
constant 68 degrees and in my house that is warm! When I get up in the AM the house is often any where from 55 (sometimes lower) to 59 degrees.
The journey continues!

Monday, January 14, 2013

Tomato-why grow it?

As I have written earlier the tomato is one of the most popular vegetable garden plants. With all of the "things" that can go wrong in the growing season one may wonder why we plant instead of just going to the farmer's market and buying our vine ripe tomatoes there. In the long run, buying a tomato is probably  cheaper! I must admit the thought has crossed my mind these last few seasons for I have had the bad luck of blossom end rot and many of the other common maladies that can strike a tomato plant. I, however, am not one to quit just because the going gets a little tough so I plan to plant more tomato plants than I have in the past AND I am going to try starting my own from seed! I am going to take the tomato hornworm by the horns and toss it out of the garden when I see one! I am going to learn all I can to be successful growing, wonderful, delicious tomatoes in my own backyard and in soil!
Why grow your own tomatoes? Because you can! The process may not be as easy or as cheap as we would like in our modern instant gratification generation but it is a healthy process all the way from planting to eating! According to the U.S. Department of Agriculture today's tomato has 30 percent less vitamin C and thiamine and 62 percent less calcium than it did in the 1960's with a whopping fourteen times more sodium! (Hope my source is correct!) Even if the figures above are not correct, and farmers don't use all the pesticides that I read about and green house tomatoes are great and hydroponically grown tomatoes are super good I will plant my tomatoes in soil, enhanced with good compost, in my own back yard! Call me old fashion but there is something wrong with growing the food we eat in sterile, artificial conditions. A garden is in itself an artificial growing condition as we try to pull the weeds and plant what we want where we want. We do not allow nature to be will- nilly and grow what it wants where it wants. But my garden is as artificial as I want to get. I want to live with in the limits of what nature will provide for sunlight, water and nutrients (from good compost). The garden pest is a part of nature. Since the beginning of time there have been "garden pests" and nature has been able to keep things in check. If we step out of the natural setting to grow what we need to eat we will not pay attention to what is happening in our environment that may cause us great harm in the future. If we do not pay the farmer a just wage for the produce they grow they will look for cheaper yet higher producing foods at the cost of less healthy foods, more chemical fertilizers. The food chain is a very important part of life: it provides life! I advocate working the soil in a responsible, just way to ensure we have healthy food for generations to come. Plant a tomato for awareness of what it takes to grow our food and pass on the awareness to others who continue to eat mindlessly.
The journey continues!

Sunday, October 9, 2011

Ornamental kale and cabbage

Ornamental kale and cabbage are both cool weather plants that flourish in cool weather. Because they are grown for the use as an ornamental plant it is probably best not to eat any part of the pant as they are probably treated with pesticides or other harmful chemicals. As the weather cools and a frost sets in the colors of the plant should deepen. They are a good choice in the fall/winter garden for interest and color along with pansies. Kale and cabbage are closely related, one forming a head the other not. They will both flower at the end of the season. I recommend them as a fun species to add to the winter garden. Check with your local garden center as to the variety that is available in your area.

Wednesday, October 5, 2011

Brussels sprouts

From my point of view the Brussels sprout plant is unique in looks compared to other garden veggies. The sprouts we eat are of course the future flowers, then seeds, of the plant. I have not grown Brussels sprouts but have read about a technique to help keep your plant producing.
The sprouts start to form on the bottom of the stalk where a leaf grows out. When you see the tiny sprouts begin to form, break off the branches starting at the bottom and continuing up 6 to 8 inches. This technique helps to stimulate growth in the plant so it will grow taller and continue to produce sprouts and it also gives more energy for the sprouts to grow faster. If you continue to strip the branches after you harvest the lower sprouts the plant (should) continue to grow taller and produce more sprouts.
Brussels sprouts are a cool weather plant and some people won't plant them in the spring as they believe they will be bitter in the heat. But if you pick the sprouts when they are very young in the summer they are said to be tender and good to eat. And remember that if the sprouts send out seed stalks the plant is no longer "tasty"!
For fall planting, plant seedlings 10 to 12 weeks before the first fall frost date.

Broccoli

Broccoli is a cool weather crop. Plant early in the spring, 3 or 4 weeks before the last spring frost date. Plant again 6 to 8 weeks before the first average fall frost date. To harvest broccoli cut the center head when the "buds" are lose but before they open. Rub your thumb across the head if the buds are tight let it continue to grow. As soon as they feel lose cut the head even if it seems small for once the head flowers it will go to seed and stop producing. Depending on the broccoli you planted it should continue to produce "side shoots' on the stem which will  develop  small heads. It will continue to produce until the head goes to seed. If you check and collect every other day you should have broccoli for a good while.

Monday, October 3, 2011

Fall Veggies

As the heat of the summer fades into the early sunsets the avid gardener is beginning the fall vegetable garden. Not only is it cooler to work the garden in the fall but there are less pests to bother you and the plants! Here is a helpful little chart to help you plan your fall planting. Keep in mind  you need to know the first fall frost date in your area. In Raleigh, NC we can expect a frost between the end of October and the first week of November. This chart is for sowing seeds directly in the garden:
  1.  Broccoli   10 - 12 weeks before the first fall frost
  2.  Brussels sprouts  12 - 16 weeks
  3.  Cabbage  and  cauliflower 10 - 12 weeks before
  4.  Chinese cabbage  8 - 10 weeks before
  5.  Kohlrabi   6 -  8 weeks before
For transplants: on average 4 weeks later than above.
  1. Broccoli       6 - 8 weeks before
  2. Brussels sprouts  10 - 12 weeks
  3. Cabbage, cauliflower and Chinese cabbage   6 - 8 weeks
As is the case with so many plants, the timing may be different in your area or even in your backyard!